• Skip to secondary menu
  • Skip to main content
  • Skip to primary sidebar
  • Skip to footer

Lilac City Momma

  • Home
  • About
  • Budgeting
  • DIY
  • Life Hacks
  • Mommy Blog
    • Kid Things
  • Recipes
  • Travel
  • Contact

Design

The Surprising Benefits of LED Lighting

November 10, 2017 by Lynn

LED lighting is getting popular these days. A lot of people have seen tons of benefits once they switched to this type of lighting. If you are still using traditional lights like fluorescent and halogen, it is time to shift to LED. Here are some more surprising benefits that will surely make you forget traditional lighting options.

  1. They won’t get hot

Unlike fluorescent and incandescent bulbs, LEDs don’t get too hot. You can touch them after hours of use and they will still not be as hot as other types of lights. This means there is less risk of accidental fires or skin burns. You will also save more money with LED lights. There is no wonder why museums and art galleries have already started using LED lights, as they need to use such lights for several hours each day and they have to keep the lighting cool.

  1. There are no emissions

We have all been taught about the harmful effects of UV rays from the sun. The truth is that UV emissions do not just come from the sun. They can come even from the lights used at home. LED lights have little to no UV emissions. It means that they are safer to use. They are also perfect for museums since artwork or exhibits on display are often sensitive to heat. The materials used for the frames, or exhibit cases, are also very sensitive.
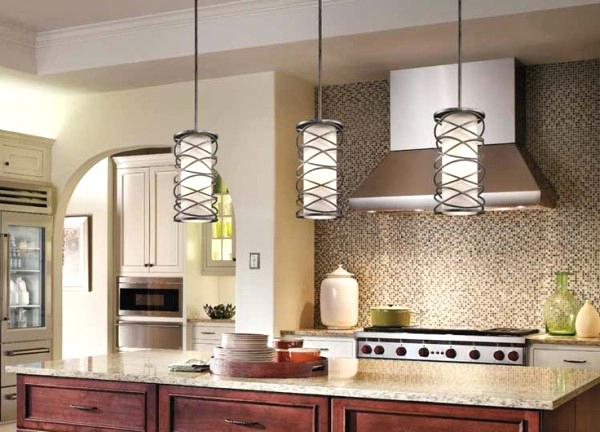
  1. Light focus

LED lights are more popular as spotlights. In the past, external reflectors were necessary in order to focus the light on just one object. Light naturally disperses. However, with LED lights, there is higher application efficiency. LED lights that are well-designed have a better capacity to deliver a beam of light directly to the desired location.

  1. No flickering

Isn’t it annoying when the lights you use at home start to flicker? It does not just affect your vision, but it is also like being in a horror movie. This can be avoided with the help of LED lights. Fluorescent lights, on the other hand, will not provide optimum illumination until they have been running for a few minutes.

These are just some of the many benefits you will get from using LED lights. Whether you are planning to use them at home or for an art gallery, you will never go wrong with LEDs.

You can shop for LED lighting solutions in your local stores or just go online and find the best lights from sites like www.downlightsdirect.co.uk. They may be slightly costly compared with traditional lights, but you will still save a lot of money in the long run, as they last longer.

Filed Under: Design

The Need to Buy GU10 Rated LED Lights

November 10, 2017 by Lynn

When buying downlights, you need to make sure that you choose a safe option. Downlights are generally used over an extended period of time. For instance, you use them in art galleries or museums. They highlight a certain object to make it clearer and more fascinating.

The problem with ordinary downlights is that they easily get hot. They also require more electricity to fully function. Worse, you have to keep replacing them since they only have a limited lifespan. Hence, LED downlights are now more popular. At first, they did not really catch on because the light produced was not as bright as traditional downlights. Eventually, better LED downlights were created. It takes several LEDs to create such a bright light, but it still works.

Of the downlights available, choose one that is GU10 rated. This means that it is a safer option. It does not heat up easily. It is not a fire hazard.

Installation is key

When you have bought the downlights, they have to be properly installed. The performance of the lights depends on the heat generated by the LED. If heat is not well-managed during the installation, it could affect the overall performance of the downlights.

Aside from choosing the right downlight, heat-sinking should also be considered. There is a metal device that you can buy which helps take the heat away from the LED.

The correct voltage must also be considered. This is why you need an expert to make sure the installation is carried out safely and correctly. Otherwise, the lights might even end up exploding.

Choosing the best light

In determining which LED downlight to buy, you need to consider its purpose. Where are you going to place it? How long do you want it to last? What colour do you want? While answering these questions, you will gradually filter the options until you end up with the perfect choice.

LED lights change in colour over time due to the frequency of use and temperature. This should not deter you from choosing LED downlights though.

You need to make sure you are getting a correctly rated GU10 LED bulb before paying for it. You might have a hard time looking for a GU 10 rated light in your local stores. But you can go online and start looking for the best choices.

Once you have bought the right downlight, ask an expert to install it for you. Better yet, before you even consider buying one, consult an expert in downlights. You will receive guidance on which downlights to buy and how you can save money using them. It won’t take much time to get them installed if you choose the right person to help you.

Filed Under: Design, DIY

When and How to Conduct a Home Electrical Inspection

October 31, 2017 by Lynn

Your home is probably your most valuable physical asset. This means you need to do everything in your power to protect it. Part of keeping a home in good condition is knowing about various kinds of necessary inspections. Here’s when and how to conduct a home electrical inspection on your home.

When to Conduct a Home Electrical Inspection

Before you go through all the effort of doing an electrical inspection, it’s good to know if this is actually necessary for your situation. There are a few times when it pretty much always makes sense to get an electrical inspection:

  • You’re Buying a House: This is the time when you absolutely need to have someone take a look at a home’s electrical system. When purchasing a home, you really have no way of knowing its true history. The previous owners could have had their cousin do some free electrical work. While this could be totally up to code, it could also be dangerous for you and your family. Always make sure to have the electrical system checked before purchasing a house—either during the standard home inspection or later with an electrician.


  • Your Home Is Really Old: Even if you’ve been in the same home for 30 years, it might be a good idea to have someone look at the electrical system. After all, it’s been at least 30 years since the last time someone inspected it. A lot can happen to electrical works over the years. Rodents can be a huge issue for electrical systems in the long term, as they are known to chew on wires.

  • You’re Adding to Your Home: Additions are great for homeowners. However, they can complicate the inner workings of a house. If you’re adding on to your home, make sure that you have an expert double check that the new electrical work matches up with the existing system.


  • Your Power Has Been Acting Up: If you’ve noticed your lights flickering, or any other kind of inconsistencies in your electricity, it’s time to have an electrical inspection. There could very well be a serious issue with your system. Ignoring this is only setting you up for a serious issue down the line.

Obviously, it’s important to make sure that your electrical panel and system are in working order. Often times, your homeowners insurance will cover this. Get homeowners insurance quotes online to find a provider that will cover replacement costs for electrical systems, or damage caused by electrical system failure.

How to Conduct a Home Electrical Inspection

For most people, doing a DIY electrical inspection is out of the question. If you’re someone who isn’t confident in their ability to diagnose home issues, don’t start out by trying to figure out the electrical system. Errors here can be much direr than in other areas. However, if you’re pretty handy around the house, there are a few things you can look for while doing your own electrical inspection:


  • Check the Service Panel: Your electrical service panel is probably on your home’s exterior, or in the garage or basement. There are a couple things to note here. It’s not a good sign if there is any damage to the service panel, or if there appears to be markings from smoke. Also check if the panel has the older, round fuses, which should be replaced. These are all reasons to call an electrician. Don’t try to fix the panel on your own, as this can be dangerous if done incorrectly.


  • Inspect Outlets: You can also do a few things to see if your home’s outlets are giving any warning signs. They shouldn’t be hot, or show anything that resembles a burn mark. It’s also a concern if you can hear a buzzing noise coming from your outlets. These are all additional reasons to call an electrician.

The electrical system is extremely important to the integrity of a home. Don’t make the mistake of thinking you can get by without an electrical inspection. This can come back to haunt you later.  

Filed Under: Design, Mommy Blog

Simple Steps to Improving the Efficiency of your Concrete Garage

October 27, 2017 by Lynn

With climate change being high on the agenda for Government officials across the world, it’s time that homeowners here in the UK begin to make their homes more efficient to lower their carbon footprint. One of the least efficient rooms in most homes is the garage, and that’s because it is an after-thought of most people because it isn’t always seen as a key area of the home.

But a concrete garage can be easily made into an efficient room, which in turn could actually lead people to start saving money on energy bills in the long term.

Here is our top tips on how you can turn your cold and costly concrete garage into an affordable and energy efficient part of your home:

Doors and windows

A lot of concrete garages are cold places, particularly in the winter, and that’s because most garage doors, internal doors and windows have gaps that can let in the cold air. One good idea, particularly for an internal door that goes into your garage, is to install weather stripping seals around the door frame. This means that no drafts will enter your home, and it will keep the air in the garage in there.

When it concerns your concrete garage door, you can apply insulation to the door through the means of what is known as an insulation kit. These can be picked up at any local DIY store and include a roll of insulation, tape and gloves. This will also prevent leaks into your garage which may come from the increase in rain during the winter months.

Meanwhile, if you have a concrete garage that has windows they need to be energy certified to keep out drafts, just like the windows you would install in your home. Generally, a lot of homeowners don’t have windows in their concrete garages, it’s more so if you are looking to convert it.

Insulate

If there is one thing that will keep your concrete garage warm and more efficient it’s insulating the walls and floor. Newer homes will always be insulated, but some garages, including those connected to your home, may not be. To keep your home and garage warm to save on energy bills during the winter, insulate your concrete garage walls by rolling the insulation between joists in the wall. We recommend you speak to a professional before you take on this task, as any errors could lead to you paying more money out in the long run.

Similarly to the walls of your garage, you should also look to sealing the edge of your garage flooring, where it meets the walls. You can do this by using a sealant based caulk, which is again available from most DIY stores. By doing this you will prevent any warm air from leaving the garage by falling through the gaps. And whilst you are working on the flooring of your garage, it might be a good idea to start sealing up any cracks in your concrete garage floor, you can use a similar sealant to do this.

Energy saving

Climate change is one of the biggest topics of conversation at the moment, with one home improvement contributing positively towards this being the installation of solar panels. This form of energy is becoming more popular with homeowners, and that’s because they can reduce energy bills massively. Using natural sunlight you will be able to light up your home and your garage, and luckily for homeowners, there is some amazing deals on with solar panels at the moment, meaning it might be a real cost-effective solution to reducing your carbon footprint.

But if solar panels aren’t for you then you could still also make your concrete garage more efficient by using LED lightbulbs. These will also reduce your energy bills and only use 12 watts of electricity which can actually create a very similar amount of light as a 60 watt bulb so you won’t even notice a difference!

It’s so important now that homeowners across the UK and even around the world, start to become more energy efficient to reduce their carbon footprint. By following the above simple steps, your concrete garage could become much more efficient like the rest of your home.

Filed Under: Design

Man Cave Decor Ideas

October 23, 2017 by Lynn

  1. Repurposed Wrench Coat Hooks

This is a fast, easy and creative way to create enough coat hooks for many guests that visit your man cave during the sports seasons. You can either go to your tool box or tool shed and find all of your old wrenches and use them. If they are rusty, make sure that you clean them and then you can either coat them some Rustoleum or shine them up and keep them as they are. Either way, put each one in a vice and bend it as much as you need to for it to be as near in half as possible. If this is too strenuous, take it to a local workshop and have it done. Then, find a space on the man cave wall, and use long screws to fasten them to the wall in a staggered formation.

  1. Vintage Television Bar Cabinet

With so many flea markets everywhere, vintage is all the rage, and what better way to store your alcohol than inside a vintage piece of cabinetry. It gives the feel of the “old days” when you watched the games with your dad on the old black and white, and it gives a whole lot of space to store your alcoholic beverages without creating actual cabinets. Just remove the “guts”, put a formed piece of wood on the inside bottom of the television to cover any holes, and insert your liquor. Then hang small lights, like mini Christmas ones, on the inside of the television above the bottles and create a warm glow.

  1. DIY Drinko Plinko Game

This is one of the games that everyone knows from the show “The Price is Right.” You can make your own version to play either while you watch your sporting events, or as a separate tournament during the sports “off season.” The directions on how to make one and how to play are here.

  1. Pinball Machine

Pinball is still the rage with the updated versions that have 3D graphics and so many different themes that it will be hard to decide which one to buy! Take a consensus of your man cave friends and have everyone pitch in and buy the two most popular choices! You can choose from many of the Justice League characters, racing themes, various forms of hunting including bow and shotgun, and even retro classics like Donkey Kong.

  1. DIY Beer Coasters

Here is a man cave DIY that you and the boys can do while you are watching the game it’s so easy! Take all the discarded cardboard beer holders and cut out the beer insignias on each one into a square that fits the same size as a square, coaster-sized piece of tile that you can buy at the local home improvement store. Then, brush some Mod Podge on the back of the cardboard and place it directly onto the front of the tile piece. Turn it over and let it dry for 20 minutes. Repeat this as many times as you have tile pieces and insignias. Then, repeat it again 2-3 more times for each tile piece until each one has at least 2-3 more layers of Mod Podge. When completely dry, affix felt adhesive strips to each back corner of every tile for non-skid use. Finally, put a top coat of clear acrylic finish on each one.

Jessica Kane is a writer for The Pinball Company, the best online source for new, used, and refurbished pinball machines, arcade cabinets, and more!

Filed Under: Design, DIY, Mommy Blog

  • « Go to Previous Page
  • Page 1
  • Interim pages omitted …
  • Page 5
  • Page 6
  • Page 7
  • Page 8
  • Go to Next Page »

Primary Sidebar

The Lilac City Momma

Hi ladies! I'm Lynn, the mother of two beautiful children. I have a 4 year old girl and an 8 month old boy. I love them beyond works, but sometimes motherhood is exhausting. So I started this blog to share all my DIY's, hacks and recipes to make life easier on moms around the world.

Follow Me!

  • Email
  • Facebook
  • RSS

Encouraging Critical Thinking Through Historical Debates

3 Back-to-School Tips for the Elderly

3 Secrets of Happy Seniors

How Can Seniors Find the Perfect Travel Companion?

Footer

Let’s Be Mom-Friends :)

  • Email
  • Facebook
  • Pinterest
  • RSS
  • Twitter
  • YouTube

Learn More About Me and My Kids

Get the Latest!

Get tips and hacks to make your mommy life easier!

© 2025 · Lilac City Momma